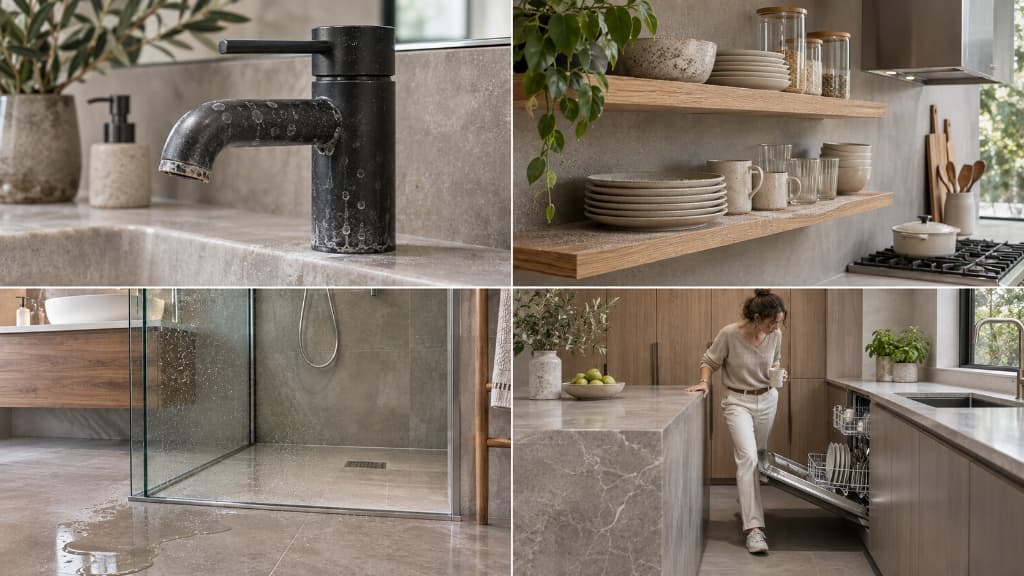
Renovation Anti-Trends 2027: 9 Pinterest Mistakes That Turn Homes into Nightmares
A brutal breakdown of viral interior design traps before 2027: why matte black faucets, acoustic slat walls, shadow gap baseboards, and open shelving can become expensive everyday regrets.
The most dangerous renovation trends aren't always ugly. Sometimes, they are the most beautiful things in the room.
There is a particular kind of home renovation disaster that doesn't begin with a collapsed ceiling, a leaking pipe, or a contractor disappearing halfway through the project. It begins with a pristine Pinterest board.
The bathroom looks flawless. The kitchen resembles a six-star boutique hotel suite. Every surface is seamless, every fixture is color-coordinated, and not a single toothbrush, frying pan, or phone charger is visible.
Then somebody actually moves in.
The matte black faucet develops chalky white mineral rings within 48 hours. The sculptural open kitchen shelves collect a sticky film of airborne cooking grease and pet hair. The trendy acoustic slat wall acts as an electrostatic dust trap. And the supposedly effortless curbless bathroom turns out to depend on razor-thin drainage tolerances and multi-layer waterproofing hidden beneath its minimalist finish.
Suddenly, the dream home has developed a demanding, high-maintenance personality.
Welcome to the renovation reality check for 2027.
The following nine viral design choices are not necessarily "ugly" or completely out of style. Rather, they are features worth reconsidering before your next remodel because they frequently create avoidable maintenance, structural sequencing, usability, or costly repair problems.
Some are stunning when properly engineered by skilled trades. Others become remarkably expensive ways to make everyday domestic life less convenient.
And one golden rule applies to every single one of them:
Important
The Renohacks Law of Viral Design: If an architectural detail looks completely effortless, find out exactly how much invisible engineering, structural precision, and daily cleaning effort is hiding behind it.
1. Matte Black Faucets: The Luxury Finish That Makes Hard Water Impossible to Ignore
The Pinterest promise: A dramatic, sculptural bathroom with high-contrast, hotel-level elegance.
The real-world reality: A chalky white mineral ring around the aerator and peeled paint around the lever within six months.
Matte black tapware became the darling of viral bathroom and kitchen design for an obvious reason: it photographs exceptionally well. Against pale travertine, warm oak, or minimalist ceramic, a black faucet creates instant graphic contrast, making a modest sink look like an architectural installation.
Unfortunately, municipal tap water has never cared about your color palette.
When tap water evaporates, dissolved calcium and magnesium carbonates remain on the surface. In regions with moderate to hard water — anything exceeding 7 grains per gallon (120 mg/L of CaCO₃) — those chalky white mineral crusts stand out violently against a dark, matte background.
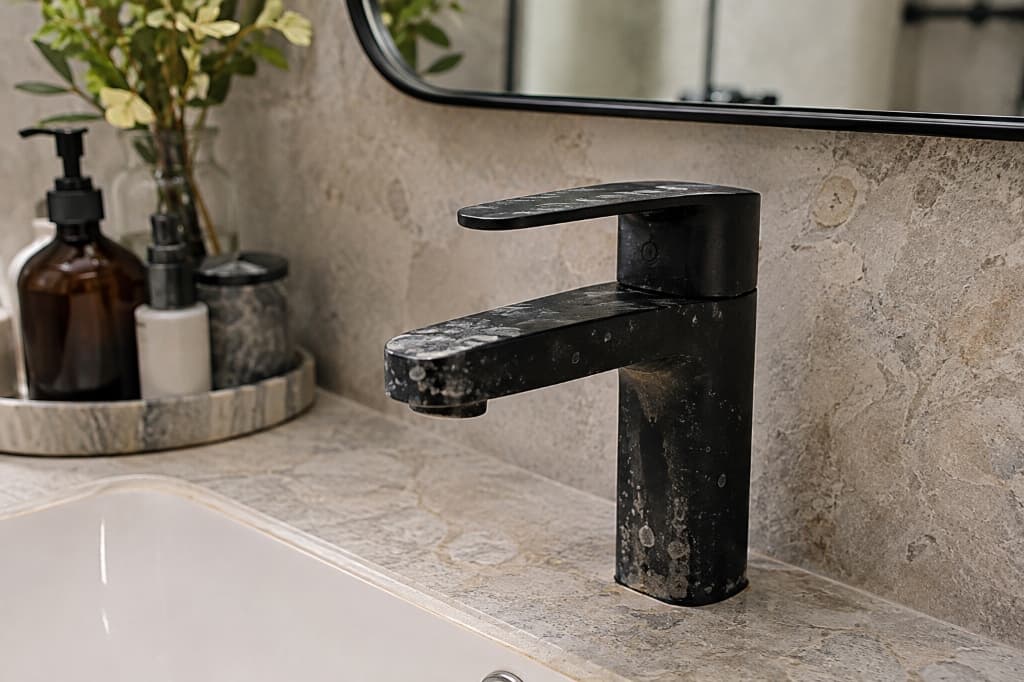
And the intuitive homeowner reaction — attacking the lime marks with acidic descalers, vinegar, or abrasive scrub pads — creates a catastrophic second failure.
Most budget-to-midrange matte black fixtures rely on electrostatic powder coating or thin liquid-painted enamel over brass. Faucet manufacturers explicitly warn against abrasive pads, acidic bathroom sprays, and ammonia-based formulas. Moen's official finish-care documentation specifically identifies matte black among its powder-coated finishes and mandates mild soap and immediate microfiber drying.
The moment you scrub a painted faucet with the rough green side of a sponge, you strip the matte micro-finish, revealing bright brass underneath.
- The Smarter Alternative: If you love dark hardware, specify PVD (Physical Vapor Deposition) finishes such as brushed gunmetal, graphite, or oil-rubbed bronze. PVD bonds titanium-based alloys at a molecular level, resisting chemical corrosion and flaking. If you have hard water, timeless brushed stainless steel or brushed nickel will save you 15 minutes of wiping every single day.
- The Verdict: Photogenic for a weekend; exhausting to maintain without a whole-house water softener.
2. Acoustic Slat Walls: When a “Soundproof” Feature Mostly Changes the Photograph
The Pinterest promise: A calm, Scandinavian-inspired media wall that provides warm aesthetics and perfect acoustic isolation.
The real-world reality: An expensive decorative dust magnet that does virtually nothing to stop sound from traveling between rooms.
Vertical wood-veneer slat panels backed by black felt have invaded living rooms, bedrooms, and home office Zoom backgrounds across the globe.
Their visual appeal is undeniable. The linear rhythm introduces architectural texture, natural wood tones soften minimalist drywall boxes, and the dark backing creates perceived depth. The breakdown occurs with the word "acoustic".
In physics, sound absorption (reducing reverberation within a room) is fundamentally different from sound transmission loss / soundproofing (preventing sound from passing through a partition wall).

Mounting a decorative 1/2-inch (12.7 mm) MDF slat panel over 3/8-inch (9 mm) polyester felt directly onto existing drywall does not add the physical mass, decoupling, or airtight seal required to stop a crying baby, loud television, or barking dog from penetrating a party wall. As the Armstrong Ceiling Solutions technical guide notes, Noise Reduction Coefficient (NRC) ratings measure reflections inside an enclosure, not transmission isolation (STC ratings).
Furthermore, there is a brutal everyday housekeeping reality:
-
The 1/2 in (13 mm) crevices between timber slats act as vertical ledges.
-
The porous PET polyester felt backing has high electrostatic surface attraction, grabbing pet fur, ambient lint, and cooking dust.
-
You cannot wipe felt with a damp sponge without pilling the fibers, meaning every single groove must be vacuumed with a delicate horsehair crevice tool.
-
The Smarter Alternative: If you need genuine sound isolation, treat the wall assembly during rough framing with double-layer 5/8 in (15.9 mm) drywall, mineral wool cavity insulation, and resilient sound-isolation clips (such as RSIC-1). Use slat panels purely as an accent wall away from cooking zones and HVAC return vents.
-
The Verdict: A pleasing visual texture; an absolute failure as a noise-blocking barrier.
3. Shadow Gap Baseboards: The Tiny Detail That Can Complicate an Entire Renovation
The Pinterest promise: Floating walls that terminate in a razor-sharp, weightless 5/8 in (15 mm) negative reveal above finished flooring.
The real-world reality: Drywall cracking, chipped plaster edges from vacuum collisions, and an inaccessible horizontal trench packed with dust.
Traditional baseboards were not invented by decorators; they were engineered by carpenters to solve two fundamental problems of physics:
- Protect the fragile, crumbly bottom edge of plaster/drywall from mops, shoes, and vacuum cleaners.
- Conceal the mandatory 5/16 to 3/8 in (8 to 10 mm) perimeter expansion gap required for floating hardwood, laminate, and LVP floors under EPLF and DIN standards.
Shadow gap baseboards (recessed architectural reveals) swap this protective trim for a negative recess. When executed properly on a multi-million-dollar project, the effect is breathtaking. But when retrofitted into a standard residential renovation, it quickly becomes an operational nightmare.
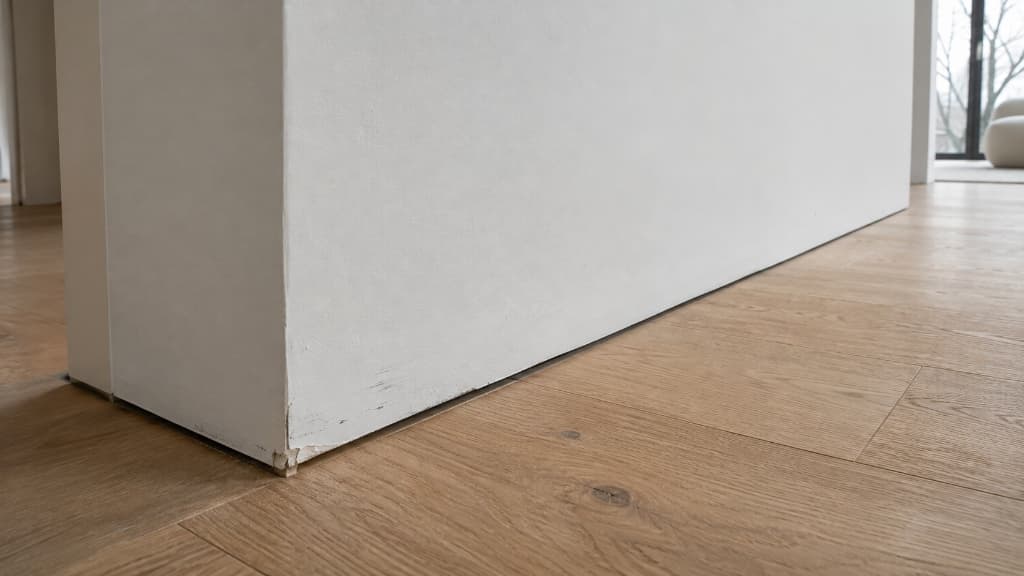
As Australian architectural moulding manufacturer Intrim's installation guidance details, true recessed aluminum reveals must be mechanically fastened to framing before drywall and plaster mudding.
If your renovation is already at the finish stage, chasing the bottom 3 in (75 mm) of concrete or masonry partitions triples your labor cost. Even worse:
- Walls must meet flawless Class Q4 / Level 5 finish tolerances; any slight bowing or curvature in the wall plane is magnified ten-fold by the straight shadow line.
- Robot vacuums bump their front bumpers directly into the unreinforced lower edge of the drywall, chipping paint and plaster down to the metal bead.
- The open horizontal trench becomes an inaccessible dust runway that standard upright vacuums cannot reach.
Tip
Before committing thousands of dollars to recessed wall profiles, read our complete breakdown in the Shadow Gap Baseboard Guide (2026): Concealed Skirting, Costs & Installation, and use our interactive Baseboard Calculator to evaluate realistic linear-foot material and labor expenses.
- The Smarter Alternative: Use micro-baseboards (anodized aluminum L-profiles that cover the expansion gap while rising only 1/4 in (6 mm) up the wall) or flush-mount concealed baseboards with solid aluminum inserts. Both deliver razor-sharp modern lines while physically shielding the wall corner.
- The Verdict: Pure architectural luxury that requires surgical rough-in sequencing; catastrophic if attempted as a DIY finishing afterthought.
4. Open Kitchen Shelving: A Beautiful Display That Demands a Beautiful Lifestyle
The Pinterest promise: An airy, open-concept kitchen filled with handmade speckled ceramics, organic linen napkins, and artisanal olive oil bottles.
The real-world reality: Sticky, dust-caked plates, exposed pasta boxes, and constant anxiety over whether your mismatched mugs look "curated."
Open shelving is without question the most viral way to strip functional storage out of a kitchen floor plan. Removing upper cabinetry makes a small kitchen feel wider and lets expensive zellige backsplash tiles run all the way to the ceiling.
However, homes are built for cooking, not staging photoshoots.
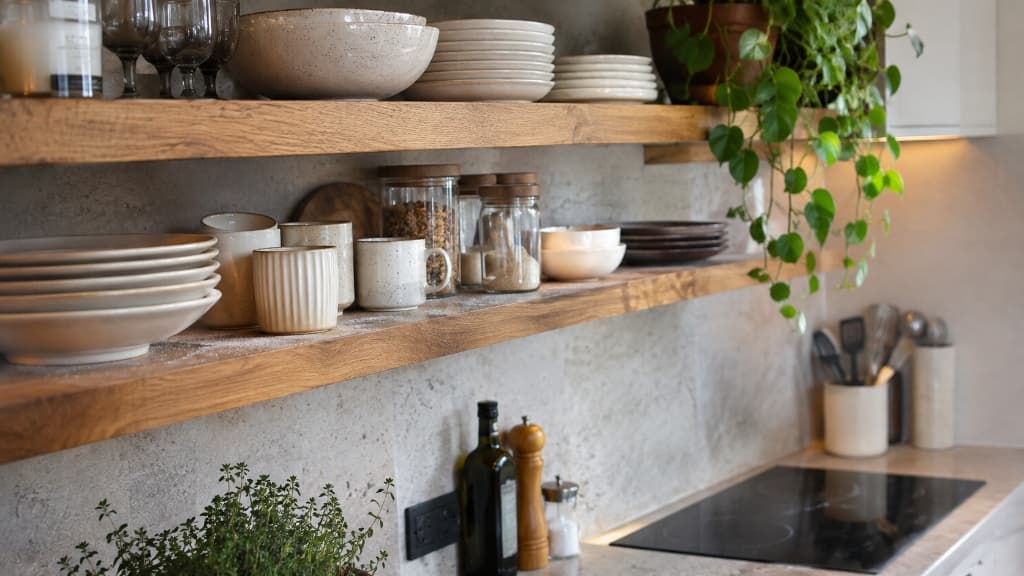
When butter, olive oil, or meats are sauteed, microscopic oil droplets become airborne aerosols. This aerosolized grease travels across the room on thermal air currents and settles on horizontal surfaces. Within three to four weeks, that grease combines with ambient household dust to form a tacky, gummy yellow coating over every exposed bowl, rim, and wooden plank.
Interior designers interviewed by Homes & Gardens confirm that homeowners who install open shelving directly adjacent to cooktops or ranges report washing clean dishes before using them simply to remove the greasy dust film.
Furthermore, closed upper cabinets perform an essential domestic service: they hide the unglamorous reality of family life — mismatched baby cups, plastic storage containers, cereal boxes, vitamins, and bulk spices.
- The Smarter Alternative: Design a hybrid kitchen layout. As detailed in our comprehensive Kitchen Trends 2026: Design, Colors & Materials guide, allocate 85% of your storage to full-depth ceiling-height cabinetry or an enclosed Appliance Garage with pocket doors, and dedicate just one compact floating shelf (far away from the stove) for everyday mugs that are washed and used daily.
- The Verdict: A charming accent when placed 6 ft (1.8 m) away from the range; a daily maintenance chore when used as your primary storage.
5. Curbless Showers: The Seamless Bathroom That Has Nowhere to Hide a Drainage Mistake
The Pinterest promise: A zero-threshold walk-in shower where continuous floor tiles stretch seamlessly into a luxury private wet spa.
The real-world reality: Soapy water flooding across the entire bathroom floor, pooling around the vanity, and saturating subfloor framing through microscopic membrane failures.
The curbless (barrier-free) walk-in shower is one of the definitive architectural bathroom trends of the decade. When designed and executed by a certified master tile contractor, it creates unparalleled visual elegance and future-proof accessibility.
The catch? A traditional 4-inch (100 mm) shower curb exists for a reason: it provides an unforgiving physical dam that forgives sluggish drains, blocked hair-catchers, and minor floor-slope variations.
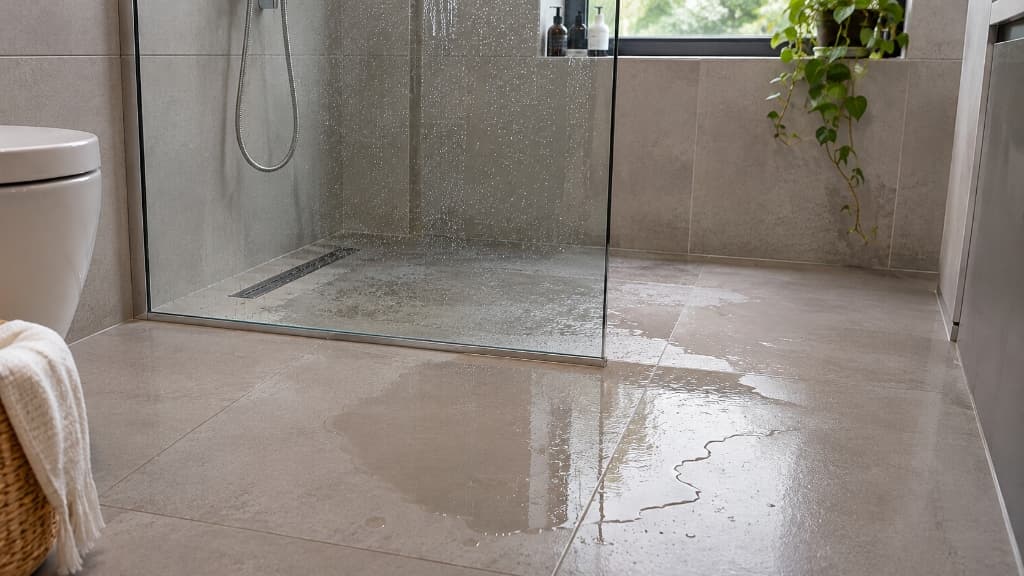
When you remove the threshold, your entire bathroom floor becomes part of an active hydraulic system:
- Floor Slope Dynamics: The shower zone requires a consistent pitch of at least 1/4 in per foot (≈2% grade) directing water toward the drain. In timber-framed construction (common across the USA and Canada), creating this slope without a step up requires either notching/recessing structural floor joists or raising the entire outer bathroom floor level.
- Drain Evacuation Capacity: Linear trench drains look sleek, but high-flow thermostatic rain shower heads (pumping 2.5 gpm / 9.5 L/min or more) easily overwhelm a drain if hair collects in the strainer. Without a curb, overflow begins in seconds.
- Comprehensive Waterproofing: As systems manufacturer Schluter Systems emphasizes, waterproofing must extend well beyond the wet area, often wrapping 3 to 6 ft (1 to 2 m) into the dry room zone and climbing up the walls to guard against capillary wicking.
- The Smarter Alternative: If structural floor height is limited, consider a minimalist, ultra-low-profile solid-surface shower tray with an integrated 1-inch (25 mm) bevel reveal, or verify that your contractor is utilizing pre-sloped uncoupling systems with certified flood-testing prior to tile installation. Review our Bathroom Trends 2026: Curbless Showers & Natural Storage report for tested drainage configurations.
- The Verdict: Phenomenal when engineered with millimeter precision; an immediate structural hazard when rushed.
6. Microcement Bathrooms: The Seamless Look That Still Needs a Waterproofing Plan
The Pinterest promise: A sculptural, organic Mediterranean sanctuary with zero grout joints, warm earthy textures, and monolithically plastered walls.
The real-world reality: Dark moisture stains that never dry out, micro-cracks telegraphing through from shifting substrates, and peeling varnish.
Microcement (also marketed as microtopping or polymarble plaster) has exploded on Instagram and TikTok as the "death of bathroom tiles." The promise of a continuous, grout-free stone-like shell is deeply seductive.
However, homeowners frequently make one fatal assumption: they believe microcement is inherently waterproof.
Microcement itself is cementitious — it is porous and readily absorbs water.
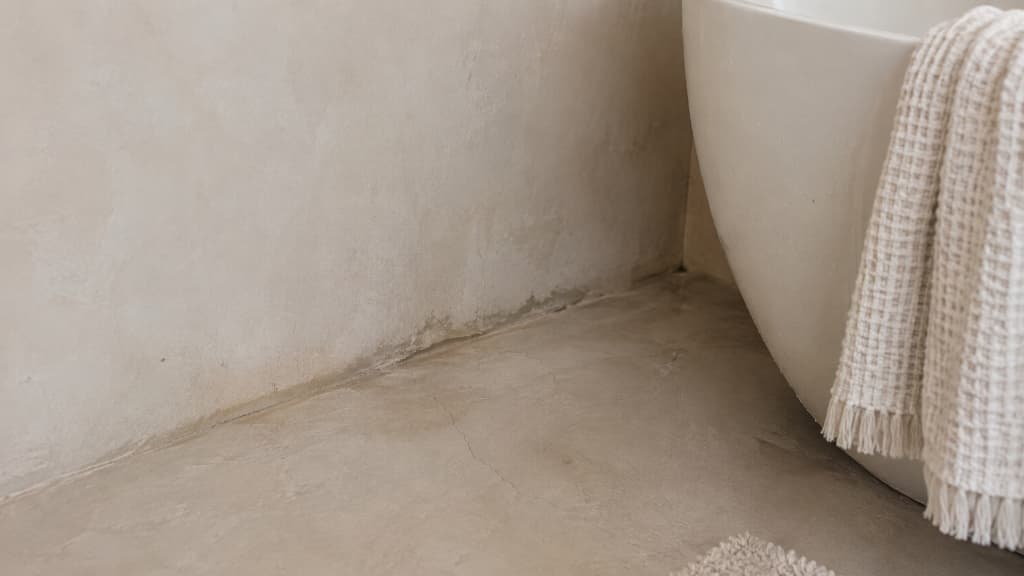
The entire water resistance of a microcement wet room depends on two non-negotiable factors:
- An elastomeric liquid or sheet waterproofing membrane applied behind the microcement layer.
- Multiple coats of high-grade, two-component (2K) aliphatic polyurethane sealer applied over the top.
Australian architectural surface specialist MVP Products highlights that decorative surface sealers must never be confused with behind-the-wall building code waterproofing. If water finds a pinhole around a plumbing escutcheon or inside a shower niche, it migrates beneath the sealer, turning the light beige plaster into permanent dark grey moisture blooms that harbor mold and eventually delaminate in sheets.
Moreover, microcement has virtually zero tensile flexibility. If applied over wood subfloors or dynamic drywall partitions without decoupling mesh, structural building movement telegraphs straight to the surface as hairline fractures.
Note
Review our in-depth engineering breakdown in Microcement in Interior Design 2026: The Raw Truth from Field Experts for Taber abrasion test realities and contractor checklist rules.
- The Smarter Alternative: If you crave the continuous stone aesthetic without chemical maintenance anxiety, install oversized matte porcelain slabs (up to 48×96 in / 120×240 cm) with color-matched epoxy grout. You get 98% fewer seams with 100% impervious porcelain durability.
- The Verdict: An exquisite artisan finish that requires an elite installer; catastrophic when treated as a quick DIY tile replacement.
7. Giant Tiles and Almost Invisible Grout: When the Floor Refuses to Be Perfect
The Pinterest promise: Colossal porcelain slabs with microscopic 1/32 in (1 mm) grout joints that read as a single sheet of polished Italian marble.
The real-world reality: Sharp edge lippage that catches your toes, hollow-sounding floor tiles, and costly cracked slabs.
Large-format porcelain tiles (ranging from 24×48 in / 60×120 cm up to monumental 48×96 in / 120×240 cm sheets) have revolutionized surface design. Fewer grout joints mean fewer dirt lines and a genuinely expansive architectural feel.
The trap lies in treating giant ceramic slabs like traditional 12×12 in (30×30 cm) floor tiles.
A 4-foot rigid porcelain slab has zero flex. If your concrete screed or wood subfloor has the slightest hump, dip, or deflection, a large tile cannot conform to it.
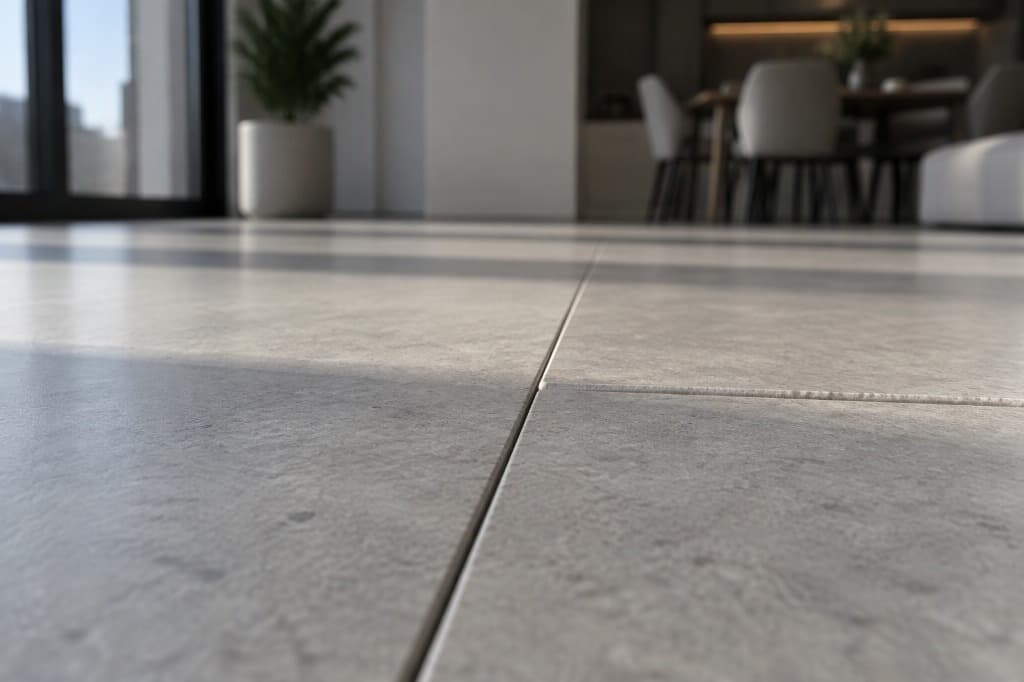
According to the Tile Council of North America (TCNA) and technical guidance published in Construction Canada, substrates for large-format tile (any tile with one side exceeding 15 in / 38 cm) must meet strict flatness tolerances:
- Maximum deviation of 1/8 inch over 10 feet (3 mm over 3 meters), and no more than 1/16 inch in 24 inches (1.5 mm over 600 mm).
- Failure to achieve this flatness leads to tile lippage — where the edge of one tile sits higher than its neighbor. In a bare-foot bathroom, a 2 mm lippage edge is literally a razor blade waiting for your big toe.
Additionally, viral social media posts promote "zero-grout" installations. In building physics, there is no such thing as zero grout. Porcelain tiles expand and contract with seasonal indoor temperature and underfloor heating cycles. Eliminating the recommended minimum 1/16 to 1/8 in (1.5 to 3 mm) grout joint causes tiles to exert lateral pressure against each other, causing tenting and edge spalling.
- The Smarter Alternative: Budget for complete substrate leveling (self-leveling underlayment / SLU) before buying tile. Mandate that your tile setter uses mechanical screw-down leveling spacers and a back-buttering technique to achieve 95%+ mortar coverage. Use our Tile & Grout Calculator to accurately budget material waste.
- The Verdict: Magnificent luxury that is 80% substrate preparation and 20% surface tile.
8. Oversized Kitchen Islands: The Status Symbol That Steals Your Walking Space
The Pinterest promise: A monumental monolithic island large enough to seat six guests, host holiday buffets, prep dinner, and act as the commanding focal point of the home.
The real-world reality: A continuous obstacle course that makes loading the dishwasher and opening the refrigerator simultaneously impossible.
The kitchen island has evolved from a functional butcher-block prep cart into the ultimate suburban status symbol. Real estate listings trumpet "oversized entertainer islands," and Pinterest feeds showcase 12-foot (3.6 m) quartz monuments.
Yet an oversized island dropped into an inadequately sized kitchen destroys the sacred kitchen work triangle.
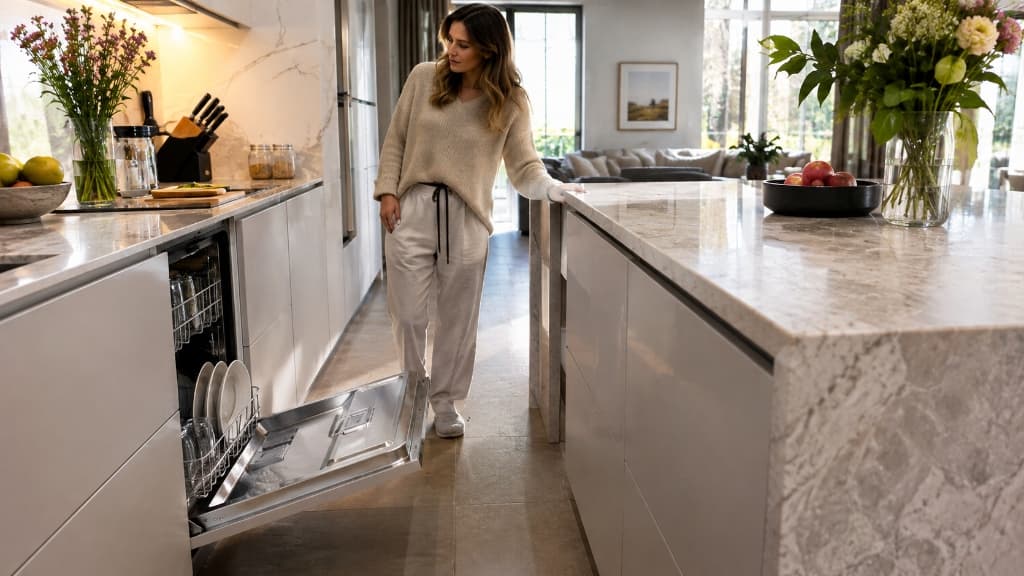
The National Kitchen & Bath Association (NKBA) Planning Guidelines establish clear ergonomic clearances:
- Minimum 42 inches (1,067 mm) of clear walkway width for single-cook kitchens.
- Minimum 48 inches (1,219 mm) of clear aisle width for multi-cook households.
- A minimum 36 to 44 inches (914 to 1,118 mm) clearance behind seated diners to allow unhindered foot traffic.
When homeowners shoehorn an 8-foot (2.4 m) island into a room with only 32 to 34 inches (810 to 860 mm) of clearance:
-
Opening the dishwasher door blocks the entire pathway.
-
When someone sits on a counter stool, nobody can open the refrigerator or pass behind them.
-
Reaching the middle of an oversized 5-foot-deep (1.5 m) island to wipe up a spill requires a step ladder or belly-flopping across the quartz.
-
The Smarter Alternative: Prioritize breathing room over island acreage. If your clearance between opposing cabinet runs is less than 13 ft (4 m), choose a graceful L-shaped peninsula or a freestanding, shallow furniture-style table on casters that allows natural movement.
-
The Verdict: The best kitchen island is not the biggest one in the showroom; it is the one you can walk around without bruising your hips.
9. Invisible LED Lighting: The Gorgeous Glow You May Not Be Able to Repair
The Pinterest promise: Weightless floating ceilings, illuminated recessed baseboards, glowing shower niches, and glare-free indirect perimeter light.
The real-world reality: A flickering yellow dead zone buried behind sealed drywall and plaster, requiring sledgehammers to replace a $20 power supply.
Architectural LED linear lighting has completely redefined modern interior design. Replacing harsh central ceiling spotlights with soft 2700K indirect coves creates depth, drama, and sublime visual comfort.
The disaster begins when lighting is permanently entombed into the building envelope without an engineering service strategy.
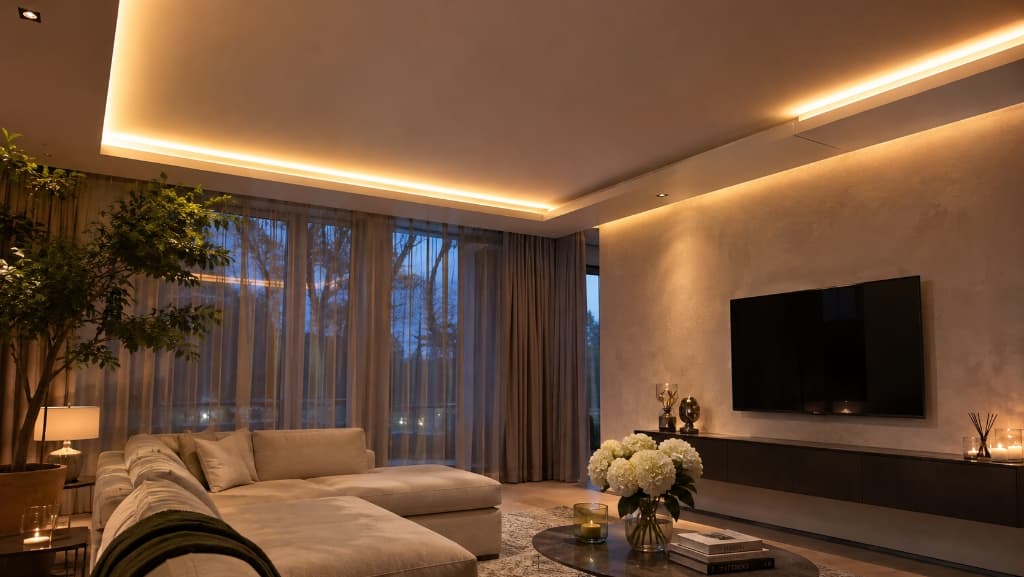
An LED strip installation is an electrical ecosystem containing three distinct components:
- The low-voltage LED tape (typically 24V DC).
- The aluminum extrusion profile acting as a heat sink.
- The AC-to-DC transformer / LED driver (which generates heat and has a finite lifespan of 3 to 7 years).
Architectural lighting manufacturer aspectLED's technical installation guide explicitly instructs contractors: transformers and drivers must remain permanently accessible for inspection and replacement.
When a general contractor buries the driver inside a sealed drop ceiling or behind finished bathroom wall tiles:
-
When the driver inevitably burns out or flickers, you cannot simply swap it out.
-
You are forced to cut through finished drywall, re-tape, re-mud, and repaint the entire ceiling.
-
Cheap LED strips mounted without aluminum profiles overheat and turn yellow, losing 40% of their lumen output within 18 months.
-
The Smarter Alternative: Always house LED drivers in a centralized, ventilated low-voltage cabinet (such as an electrical closet or under-sink cabinet) with home-run wiring. Specify snap-in silicone diffusers that can be pulled out by hand without chipping the surrounding plaster reveal.
-
The Verdict: Spectacular architectural ambiance — provided you plan for the day the electronics need maintenance.
The Real Renovation Trend for 2027: Homes That Work as Beautifully as They Look
There is nothing inherently evil about a matte black faucet.
There is nothing flawed about wood acoustic slats, floating shadow reveals, curbless showers, or dramatic cove lighting.
The failure lies in believing that an algorithmically polished 5-second video clip tells the full story of home ownership.
A Pinterest image doesn't show:
- The three layers of bonded uncoupling membrane beneath the curbless stone floor.
- The laser-guided substrate leveling required to prevent giant tiles from lipping.
- The whole-house water softening filtration system keeping the black brass pristine.
- The weekly microfiber regimen keeping open shelves free of rancid cooking grease.
A home is not an art gallery or a digital backdrop. It is a living, breathing mechanical machine where children drop toys, dogs track mud, hard water flows through pipes, and dinners are cooked.
Before you hand your architect or general contractor a viral screenshot, run it through the Renohacks Reality Filter:
5 Questions to Ask Before Copying Any Viral Renovation Detail
- What will this surface look like after six months of normal, messy family living?
Demand to see photos of the material aged in a real lived-in home — not a staged showroom on delivery day. - What precise maintenance protocol does the manufacturer mandate to preserve the warranty?
If cleaning a bathroom faucet requires distilled water and immediate chamois drying, determine whether your daily lifestyle realistically accommodates that. - What invisible structural and waterproofing engineering does this feature demand behind the scenes?
Verify whether your floor joists, plumbing stacks, and electrical circuits can physically support the detail without dangerous compromises. - Can this feature be inspected, serviced, or repaired without demolishing finished architectural surfaces?
Ensure that every valve, LED driver, drainage trap, and electrical relay remains accessible through discreet service hatches. - Does this design solve a genuine problem in our daily life, or does it merely photograph well?
Design your home around your actual morning routine, your cooking habits, and your physical comfort — not the fleeting aesthetic approval of an online audience. For a complete look at sustainable, lived-in aesthetics that prioritize longevity, explore our forecast on Interior Design & Renovation Trends 2027: Rebellion Against Sterility and our breakdown of Quiet Luxury Interior Design 2026.
Frequently Asked Questions
Why are matte black faucets considered a risky renovation choice?
Matte black faucets rely on electrostatic powder coating or thin liquid enamel that easily highlights white calcium and magnesium mineral scale in hard-water areas. Scrubbing with acidic descalers or abrasive sponges damages the coating and exposes raw brass. If you prefer dark fixtures, opt for Physical Vapor Deposition (PVD) gunmetal finishes, which molecularly bond to the substrate and resist corrosion.
Do acoustic timber slat walls actually soundproof a room?
No. Slatted wood panels with polyester felt backing provide sound absorption (reducing echoes and reverberation within the room), but they do not provide sound isolation (blocking noise from neighbors or adjacent rooms). Effective soundproofing requires structural mass, airtight seals, and mechanical decoupling inside the wall cavity. Additionally, the narrow gaps collect dust and pet hair that require specialized vacuum attachments to clean.
What are the main drawbacks of shadow gap baseboards?
Shadow gap profiles must be fastened to wall studs before drywall hanging and plastering, making them expensive to retrofit. They require Level 5 / Class Q4 surface flatness because the straight shadow line magnifies any wall bowing. Functionally, open shadow reveals create an unreinforced bottom plaster edge vulnerable to chips from vacuum cleaners and mops, while collecting floor dust in an inaccessible recess.
Why is open kitchen shelving being abandoned in 2027?
In real kitchens, airborne cooking grease aerosols combine with circulating dust to coat exposed dishes in a sticky yellow film within weeks. Open shelves eliminate valuable enclosed storage for unglamorous food staples and require constant styling. Modern 2027 design favors appliance garages with pocket doors and closed upper cabinetry, reserving single floating shelves purely for daily-use mugs far from the stovetop.
What is the biggest danger of a curbless walk-in shower?
Without a physical 4-inch (100 mm) curb, water containment relies 100% on floor pitch (minimum 1/4 inch per foot / 2% grade) and drain evacuation capacity. If hair restricts the linear drain or high-flow showerheads pump over 2.5 gpm (9.5 L/min), water quickly escapes into the dry bathroom zone. In timber-frame buildings, cutting floor joists to create the recess without structural reinforcement can cause long-term floor sag and membrane failure.
How should concealed LED cove lighting be installed to prevent maintenance nightmares?
LED transformers and drivers have a service lifespan of 3 to 7 years and must never be sealed inside drywall ceilings or behind tile. Always locate power supplies in an accessible, ventilated electrical cabinet with dedicated home-run wiring. Use snap-in silicone diffusers and aluminum heat-sink profiles to prevent thermal degradation and allow easy strip replacement without damaging plaster.
Calculate tile and waste first
Start with the main calculator, then use the two tools that most naturally follow this article.
This piece is grounded in current trends, room-by-room practice, and decisions that translate into real remodel work.