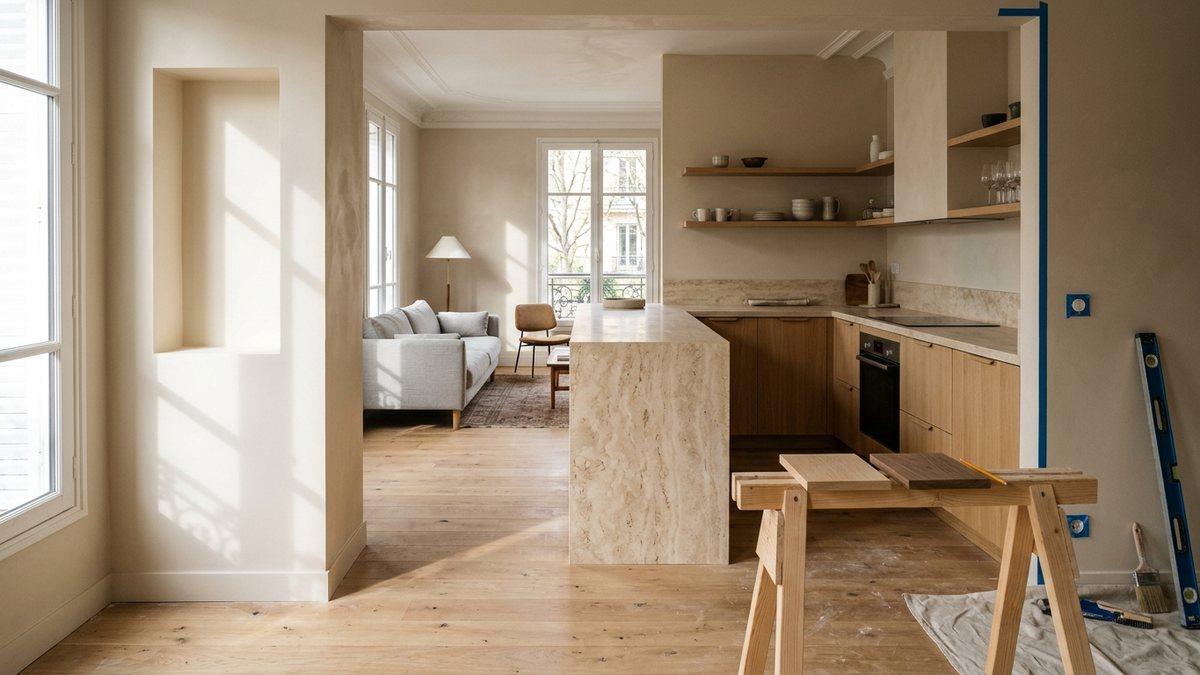
What Contractors & Designers Won't Tell You: 9 Secrets to Cut Renovation Costs by 40% Without Looking Cheap
An insider architectural breakdown of hidden remodeling markups for 2026–2027: why Level 5 drywall, full-height bathroom tile, and custom cabinet boxes waste money—and where to invest for a high-end look.
The worst renovation advice on the internet always sounds the same: "Buy clearance ceramic tile, hire the cheapest crew on Craigslist, and install bargain-bin laminate."
In the real world, that path doesn't lead to savings—it leads to forensic rework. A cut-rate installer will ruin even modest porcelain slabs, paper-thin laminate will buckle at the first seasonal humidity swing, and the home will feel like a tired roadside rental before the moving boxes are unpacked.
The true paradox of residential construction is far more interesting: between 35% and 40% of a typical renovation budget is swallowed by invisible over-specification, showroom referral kickbacks, and outdated trade habits that add zero structural longevity and zero visual prestige to your home.
Homeowners routinely spend thousands of dollars skimming drywall to museum tolerances behind future wardrobes. They pay a 300% boutique studio markup for standard white melamine cabinet boxes. Or they tile all four bathroom walls up to an 8 ft (2.4 m) or 9 ft (2.75 m) ceiling simply because nobody questioned the scope.
Here are the nine architectural, engineering, and procurement strategies that general contractors, project managers, and building inspectors use when remodeling their own homes across the US, Europe, and Singapore—cutting up to a third of the invoice while making the finished space look twice as expensive.
Important
The Renohacks Law of Smart Value Engineering: Never cheap out on the chemistry or mechanical integrity hidden inside your walls. Save aggressively on the surface area of high-labor finishes, redundant wall-prep classifications, and bespoke markups on standardized structural boxes.
1. Level 3 / Q2+ Wall Prep with Architectural Liner Fleece Instead of the “Level 5 / Q4 Trap”
The Estimate Myth: To get smooth painted walls, every room must be skim-coated to a mirror-like Level 5 (US) or Q4 (European) finish and inspected under a raking halogen work light.
The Engineering Reality: In a lived-in home with normal daylight, the visual difference between a Level 3 / Q2+ wall reinforced with non-woven painter's fleece and a full Level 5 / Q4 skim coat is virtually undetectable—while the labor and material savings reach 35% to 45%.
Wall preparation is the single most inflated line item in interior finishing estimates. When a contractor bills for a Level 5 finish under Gypsum Association GA-214 standards (or the European Q4 specification under Knauf surface quality guidelines), you are paying for full-surface polymer skim-coating across 100% of the drywall, multi-stage priming, and days of dust-heavy sanding under harsh grazing light.
Yet in standard residential bedrooms, hallways, and living areas, an unreinforced Level 5 / Q4 mud finish has two major vulnerabilities:
- A razor-thin
1/32 in (0.8 mm)polymer skim coat offers zero tensile reinforcement against normal seasonal timber-stud movement or new-build concrete slab settling during the first 24 months. - Any minor scuff from moving furniture requires a professional finisher to feather, sand, and repaint the entire wall plane from corner to corner.
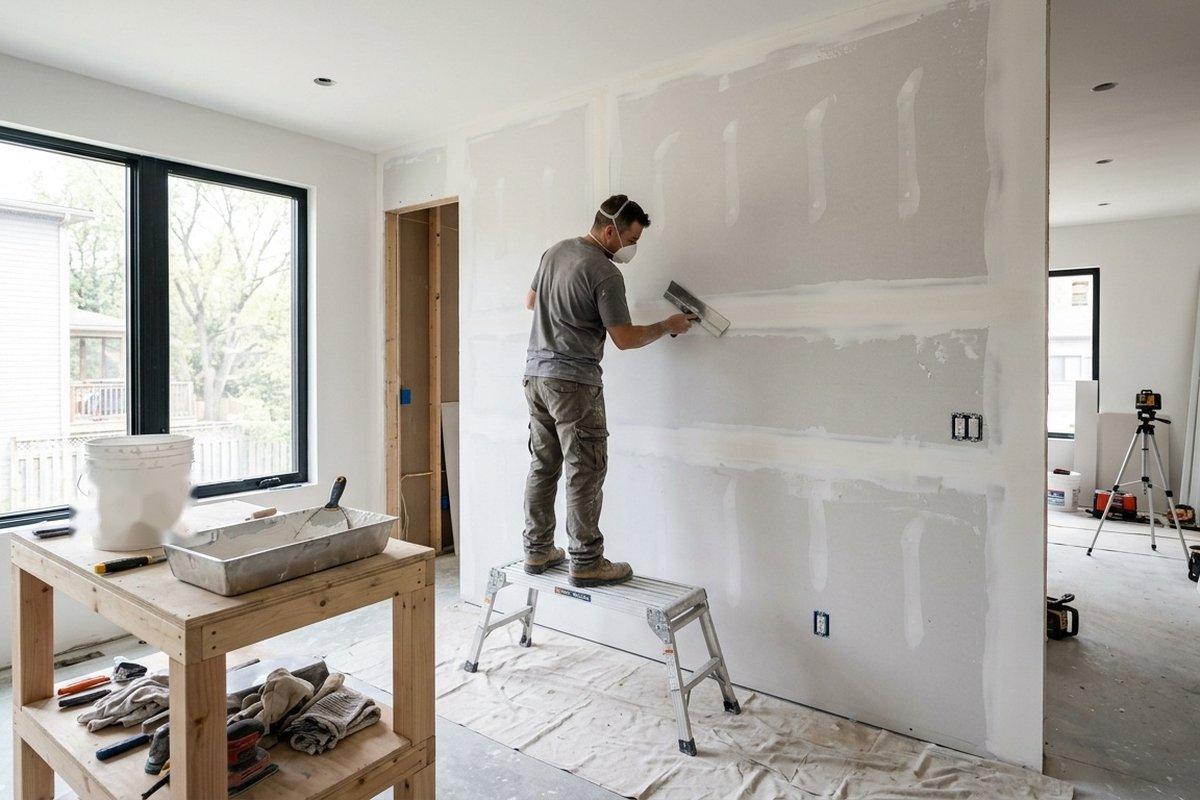
How Pros Value-Engineer Walls:
- Stop drywall joint taping or gypsum plastering at an honest Level 3 (US) / Q2+ to Q3 (Europe) tolerance—ensuring the wall plane is plumb within
1/8 in over 6 ft (3 mm over 2 m), without paying for full-surface cosmetic skimming. - Hang smooth, heavy-duty non-woven cellulose/fiberglass painter's liner fleece (
4.1–4.4 oz/sq ydor130–150 g/m²) using breathable dispersion adhesive. - Roll two coats of high-solids, dead-flat architectural paint (
3%–5%sheen).
The dense liner fleece bridges hairline substrate micro-cracks, absorbs harsh window glare, delivers a calm gallery-grade matte texture, and cuts painting prep costs by a third. Before ordering primer and finish gallons, run your exact room dimensions through our Paint Calculator or use the interactive widget right below:
Paint Calculator
Calculate the exact amount of paint needed for walls and ceilings, accounting for windows, doors, and multiple coats.
2. The 40% Wet-Zone Rule: Stop Tiling Bathroom Walls Floor-to-Ceiling
The Estimate Myth: A durable bathroom requires porcelain tile across 100% of all four walls from floor to ceiling.
The Engineering Reality: Liquid water only contacts 35% to 40% of a bathroom's vertical perimeter. Tiling the remaining dry walls doubles your spend on porcelain, thin-set mortar, epoxy grout, and master tile-setter labor.
Look at the math of a typical 50 sq ft (4.6 sq m) bathroom with 9 ft (2.75 m) ceilings. The total wall area minus the doorway is roughly 250 sq ft (23.2 sq m). Today, the installed cost of porcelain tile—factoring in modified thin-set mortar (US ANSI A118.4 or European C2TE), grout, trim profiles, and skilled labor—easily runs 2.5 to 3 times the retail price of the tile itself.
Worse still, every external drywall box (such as a concealed toilet cistern or plumbing chase) triggers per-linear-foot charges for 45-degree mitered porcelain edges (jolly cuts), one of the slowest and most expensive operations on site.
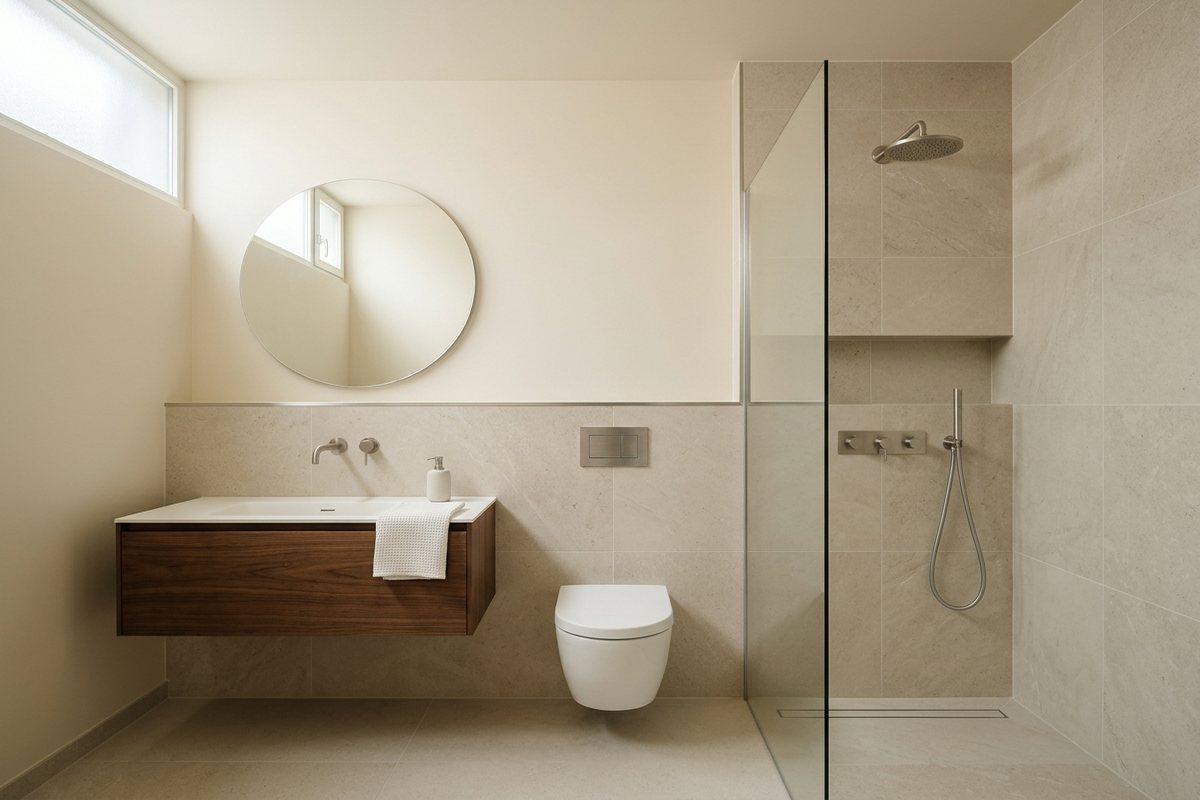
How Pros Value-Engineer Bathrooms:
Adopt the European and boutique-hotel zoning standard:
- Full height (
100%to ceiling): Tile only inside the walk-in shower enclosure or around the bathtub alcove. - Datum wainscoting height (
44–48 inor110–120 cmoff the floor): Run tile only as a half-wall ledger behind the vanity sink and wall-hung toilet carrier. - All remaining dry walls and upper zones: Skim with cementitious moisture-resistant compound, prime, and coat with specialized bathroom architectural paint rated to Wet Scrub Class 1 under DIN EN 13300 (or
ASTM D2486mildewcide-fortified bath enamel, losing less than5 micronsafter 200 scrub cycles).
The Payoff: You eliminate 110–130 sq ft (10–12 sq m) of tile and setting labor, banish the claustrophobic "tiled bunker" feel, and keep 30% to 35% of your bathroom budget in your pocket. Calculate your exact wet-zone tile boxes and mortar bags with zero guesswork using our Tile Calculator below:
Tile Calculator
Calculate the exact number of tiles needed for floors or walls, including waste, grout, and adhesive.
Measure from wall to wall
From one wall to another
If there is a built-in bathtub or fixed screen
Indicated on the package, e.g. 30×30 cm
For square tiles, same as length
For grout calculation
Usually 1.5–3 mm
For pack count
If work experience is low, add 5–10%
3. The Kitchen Hybrid Bluff: Commodity Carcasses + Bespoke Fronts and Stone
The Estimate Myth: A $40,000 designer showroom kitchen is structurally superior in every way to modular factory cabinetry.
The Engineering Reality: Behind the doors, nearly 90% of mid-to-high-end European and North American kitchens use the exact same 5/8 in (16 mm) or 3/4 in (18 mm) melamine-faced particleboard or plywood boxes.
Kitchen cabinetry is the single largest check most homeowners write during a remodel. When you buy a "turnkey custom kitchen" from a design showroom, a 200% to 300% retail margin is applied equally to the parts you admire every morning and the hidden white boxes buried against the drywall.
Here is the open secret of millwork manufacturing: the human eye never sees the cabinet carcass. Once a kitchen is installed, your eyes only register three surfaces:
- The door and drawer fronts (plus exposed end panels and toe kicks).
- The countertop and backsplash slab.
- The hardware pulls.
Meanwhile, your hands only feel the mechanical damping of the hinges and drawer slides.
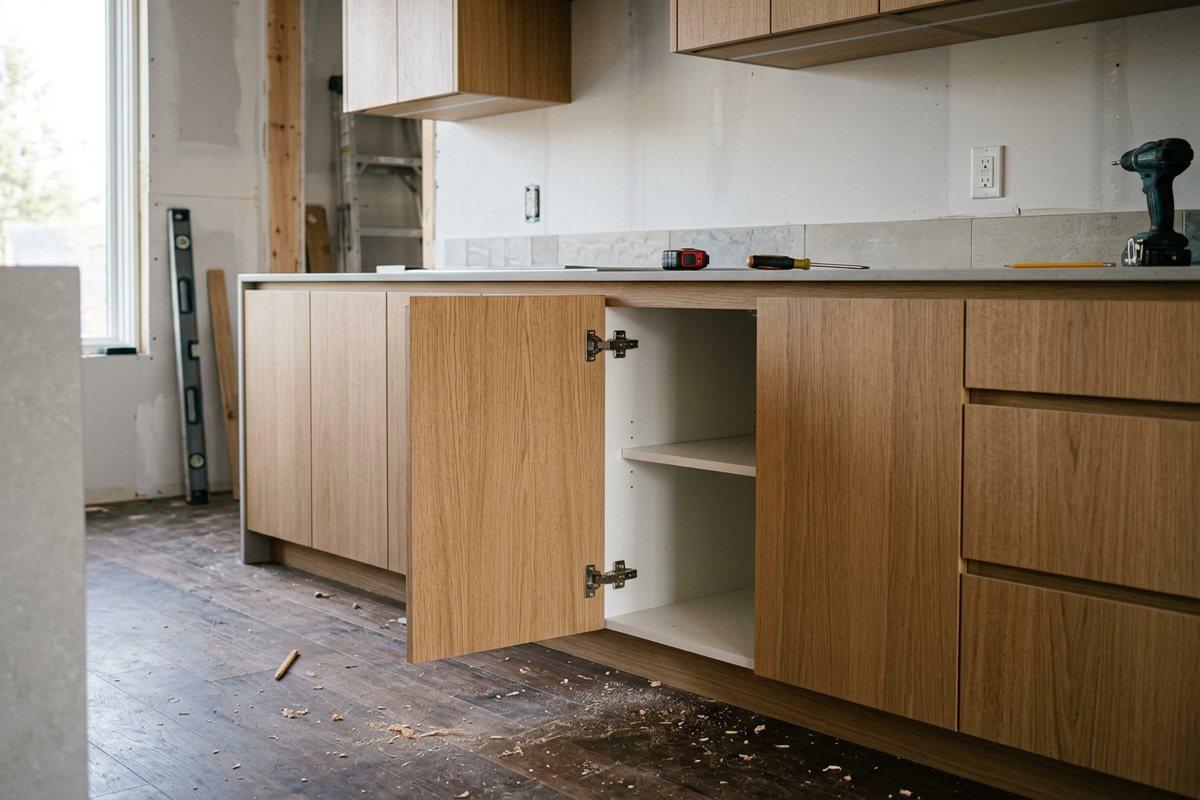
How Pros Value-Engineer Kitchens:
Use the "Commodity Skeleton + Couture Face" architecture (popularized globally as the high-end IKEA SEKTION / METOD hack via custom front makers like Semihandmade, Reform, or Scherr's, and replicated across Europe and Asia with local modular factory carcasses):
- The Boxes (Carcasses): Buy standard-width modular boxes (
15 in,24 in,30 in,36 inor400 / 600 / 800 mm) from high-volume automated manufacturers. CNC mass production makes them 3 to 4 times cheaper than custom shop cutting. - The Motion Hardware: Equip every box with top-tier soft-close concealed hinges and full-extension tandem drawer runners (
Blum Legrabox/TandemboxorHettich AvanTech) sourced directly from a wholesale cabinet hardware distributor. - The Fronts & Countertop: Commission
3/4 in (19 mm)custom doors, appliance panels, and filler strips—in rift-cut white oak veneer, matte polyurethane lacquer, or super-matteFenix NTMlaminate—directly from a local CNC millwork shop, then top them with a continuous1/2 in (12 mm)sintered stone or3/4 in (20 mm)quartz slab.
Visually and mechanically, the kitchen is indistinguishable from a luxury architectural commission, while saving 40% to 50% of the total cabinetry cost. For layout clearances and work-zone ergonomics based on NKBA Guidelines, see our full guide on Kitchen Design & Layout Trends 2026.
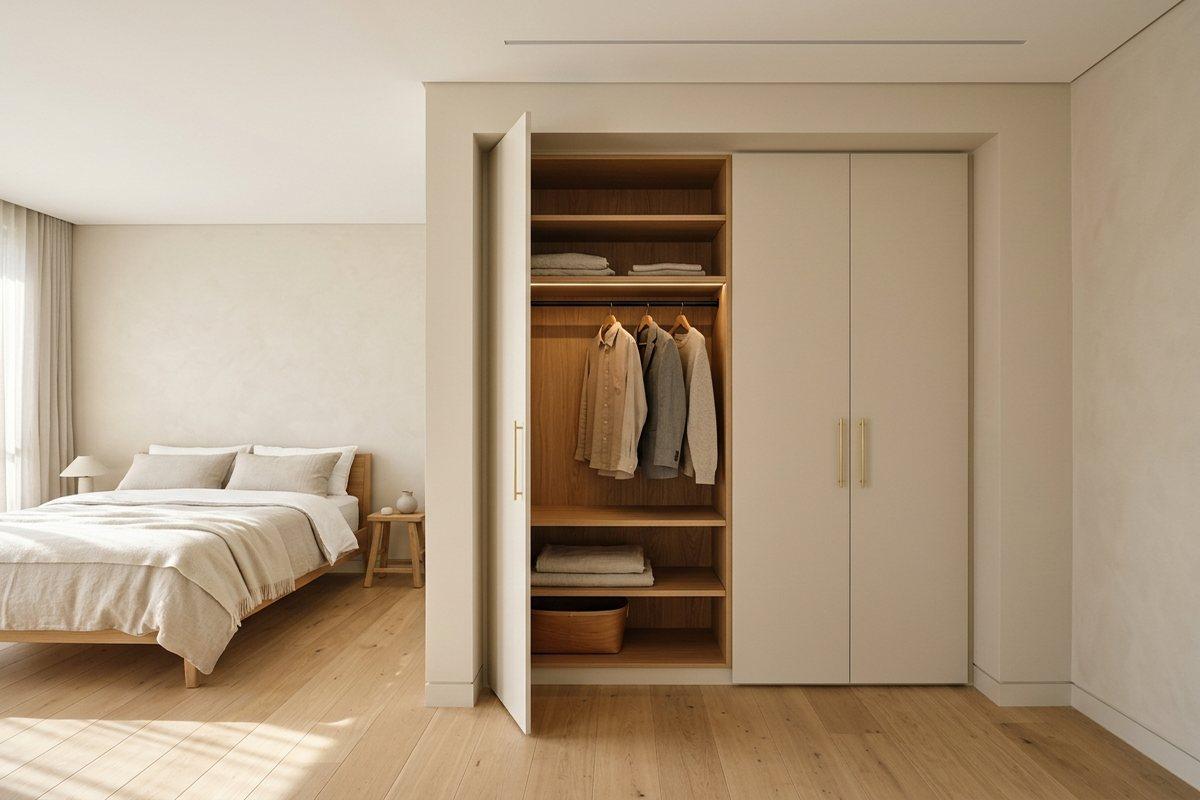
4. Framed Drywall Alcoves Instead of Full-Box Custom Wardrobes
The Estimate Myth: Floor-to-ceiling built-in bedroom wardrobes must be built entirely out of millwork cabinet boxes.
The Engineering Reality: Framing the side gables, top soffit, and back wall out of steel or wood studs and drywall during rough construction costs 5 to 7 times less than fabricating them out of veneered MDF panels.
When you request a quote for a custom built-in closet, nearly half of the material cost goes into giant 24 in (600 mm) deep by 9 ft (2.75 m) tall side panels, back panels, and top boxes that simply sit against your bedroom walls. Worse, freestanding wardrobes that leave a 2–4 in (50–100 mm) dust gap below the ceiling instantly make a room feel smaller and cheaper.
How Pros Value-Engineer Storage:
During the rough framing stage, build a U-shaped or L-shaped structural alcove (25–26 in or 620–650 mm deep) using standard 2×4 wood studs (16 in on-center in the US) or 50–75 mm galvanized steel profiles (600 mm on-center in Europe/Knauf standards), adding solid 3/4 in (18 mm) plywood blocking where hinges and closet tracks will mount:
- The outer gables, ceiling soffit, and perimeter casing are built from standard drywall and painted with the room walls—eliminating the most expensive full-height veneered MDF side panels.
- Inside the alcove, choose between two layouts: a maximum-savings build with shelving and rails mounted directly to the finished drywall walls; or a cabinet-insert build (as pictured above) where a simple unexposed interior tower is slid into the drywall frame without costly decorative exterior gables.
- Order only the flush-mounted floor-to-ceiling doors from your finish carpenter.
The Double Win: Your bedroom gets seamless, flush-to-the-wall architectural millwork at up to 60% off custom cabinetry pricing. Estimate your exact stud, track, and gypsum board quantities in seconds with our Drywall Calculator right here:
Knauf Drywall & Partition Calculator
Precise estimation for drywall partitions (W111, W112), wall linings (C623), and ceilings (D112)
Limit: 0.5 to 1,000 m
Limit: 1.0 to 20 m
400 mm for ceramic tiles
Determines wall thickness
Green for bathrooms & kitchens
3.0m for high ceilings
Limit: 0% to 30%
Limit: 0 to 50 openings
Limit: up to 999,999
Limit: up to 999,999
Detailed Material Specification (Knauf Standard)
All required components including profiles, fasteners, damping tape, joint tape and compound
| # | Material / Item | Quantity | Unit |
|---|---|---|---|
| 1 | Drywall Boards (Standard Drywall, 2.5x1.2m) Total: 25.08 m² (includes 8% waste allowance) | 9 | pcs |
| 2 | Track Profile (UW 50x40, 3m) Floor and ceiling perimeter track | 4 | pcs (3m) |
| 3 | Stud Profile (CW 50x50, 3m) Stud spacing: 600 mm | 13 | pcs (3m) |
| 4 | Acoustic Perimeter Sealing Foam Tape (Dichtungsband) Total: 17.4 linear meters (perimeter decoupling) | 1 | rolls (30m) |
| 5 | Hammer-Drive Anchors / Dowels 6x40mm Perimeter track and hanger base fixing | 50 | pcs |
| 6 | Drywall Screws Knauf TN 25mm (1") First layer drywall to metal stud fixing | 800 | pcs |
| 7 | Framing Metal-to-Metal Screws LN (Pancake Head) Stud-to-track and hanger assembly | 100 | pcs |
| 8 | Joint Reinforcing Tape (Knauf Kurt / Fiberglass) Total: 16.3m for taper and butt joints | 25 | meters |
| 9 | Joint Compound (Knauf Uniflott / Setting-Type) Ready-mix or powder setting compound | 9.9 | kg |
| 10 | Acoustic Mineral Wool Batts (50mm thick, 35-45 kg/m³) Total volume: 0.61 m³ (12.2 m²) | 3 | packs (~6 m²) |
Knauf Installation Rules & Common Pitfalls
- Perimeter Decoupling: Never mount guide profiles directly to concrete/screed without Dichtungsband tape. It prevents structural sound transmission and cracks.
- Staggered Seams: Butt seams between adjacent sheets must be staggered by at least 400 mm (16"). Cross-shaped 4-corner intersections are strictly forbidden.
- Fastener Depth: Screw heads must be countersunk by 1 mm into the board without tearing the paper liner.
Engineering Notes & Standards
Drywall assemblies calculated in strict accordance with Knauf technical bulletins and international framing standards (ASTM C754 / DIN 18181).
Acoustic Decoupling & Vibration
- Dichtungsband polymer tape under perimeter tracks reduces flanking noise transmission by 6–10 dB.
- Double-layer drywall (W112) with acoustic mineral wool achieves sound insulation index Rw up to 56–59 dB.
Framing & Fastener Rules
- For ceramic tile application, use 16" (400 mm) stud spacing and moisture-resistant boards.
- Do not use gypsum plaster on metal corners without rust-inhibiting coating.
5. Defeating the “10% Designer Showroom Discount” & Rough-Material Padding
The Estimate Myth: Using your designer's "exclusive 10% trade discount" at a boutique tile or lighting showroom—and letting your contractor buy all rough materials on a cost-plus basis—saves you money.
The Engineering Reality: Unaudited showroom referrals and padded rough-in material invoices quietly drain 15% to 35% of a homeowner's renovation budget.
Let's pull back the curtain on two industry-wide pricing mechanics that rarely get discussed in polite company:
- Showroom Trade Commissions (Retro-Bonuses): High-end tile, plumbing, and decorative lighting showrooms routinely bake a 25% to 40% trade margin into their retail price tags. When a specifier walks you into a partner showroom and generously hands you a "10% client discount," the showroom quietly wires the remaining 15% to 25% of your paid invoice back to the referrer as a commission.
- Rough-In "Air" on Invoices: When rough materials (
50 lb / 22.7 kgbags of self-leveling underlayment,25 kgbags of cement screed, drywall compound, orRomex / NYMcable rolls) are billed without independent quantity verification, estimates routinely carry a 20% to 30% buffer. Leftover pallets either get returned for store credit or loaded onto a van for the crew's next job.
How Pros Protect the Budget:
- Unbundle Design from Procurement: Pay your designer a transparent, flat architectural fee for drawings and an itemized specification sheet containing exact manufacturer part numbers (SKUs). Take that SKU list to 3–4 authorized multi-brand wholesalers or online distributors and ask: "What is your best project-lot price if I wire payment for the full order today?" You will routinely unlock 18% to 25% off retail.
- Use the Big-Box "Pro Desk Bid Room" Trick: If you are spending over
$2,500–$5,000(€2,500+ / S$3,500+) on materials at major building suppliers (Home DepotorLowe'sin the US,BauhausorHornbachin Europe), never check out at the regular register. Take your consolidated material list to the Pro Desk and ask them to run it through the Bid Room. Volume pricing algorithms automatically shave 8% to 22% off the retail total. - Verify Rough Quantities by Physics: Before approving a rough-material invoice, plug your room dimensions and pour depth into our Screed & Self-Leveling Calculator and Flooring Calculator. When engineering math proves your subfloor needs
65 bagsincluding a 10% waste factor—and the quote asks for110 bags—you stop the leak before signing the check:
Screed Calculator
Calculate screed volume, dry mix, bag count and water for a floor leveling layer.
6. The One “X-Ray Question” That Stops Contractor Change Orders Cold
The Estimate Myth: Collect three contractor quotes and hire the builder with the lowest bottom-line number.
The Engineering Reality: The lowest initial bid almost always becomes the most expensive final invoice through weaponized Change Orders.
Unscrupulous contractors rely on a classic bidding trap: to win the job, they intentionally strip mandatory preparatory steps out of the initial quote.
The proposal simply reads: "Install porcelain floor tile — $X per sq ft" and "Skim and paint walls — $Y per sq ft." You sign the contract, demolition finishes, and by Week 2 the ambush begins:
- "Concrete bonding primer wasn't included in the wall quote";
- "Grinding high spots on the subfloor, installing crack-isolation membrane, and setting leveling clips are extra line items";
- "Core-drilling outlet holes in porcelain slabs and hauling debris to the dump are billed separately."
By the time the dust settles, the lowball bid has ballooned by 40% to 60%, and your home is already torn apart.
How Pros Vet Bids:
When reviewing quotes with prospective contractors, never ask "Can you do this cheaper?" Instead, hand them your scope of work and ask one surgical question:
“Look closely at this estimate: what mandatory code or prep steps are MISSING from this sheet that will trigger a Change Order once you open up the walls?”
This single question acts as an instant truth serum:
- A corner-cutting bidder will get defensive and insist "everything is covered."
- A seasoned, honest builder will immediately point out real-world contingencies: floor protection board (
Ram Board), subfloor self-leveling tolerances, waterproofing bandage tape at wet corners, pressure-testing manifolds, and dumpster haul-away fees.
Have every identified item written into the contract addendum prior to signing, paired with a strict clause: "This scope represents a complete turnkey installation per applicable building codes (IRC / NEC / TCNA / DIN). Any intermediate preparation required by manufacturer specifications that was omitted by the Contractor during bidding shall be performed at the Contractor's sole expense."
7. The Touchpoints Rule: Spend 5% of Your Budget Here to Make the Whole Home Feel Twice as Expensive
The Estimate Myth: To achieve a luxury interior, you must buy premium-grade finishes across every square foot of the home.
The Engineering Reality: Within the first 10 seconds of entering a room, the human brain judges the value of a renovation not by the brand of drywall mud or the cost of hallway tile, but by four physical sensory touchpoints.
Luxury hospitality developers—from Milanese boutique hotels to high-end Singapore condominiums—build their budgets around asymmetric allocation (High-Low Mixing). Because humans experience architecture through touch, weight, and sound, you can pair cost-effective field surfaces with jewel-like hardware at the exact points where hands and eyes make daily contact.
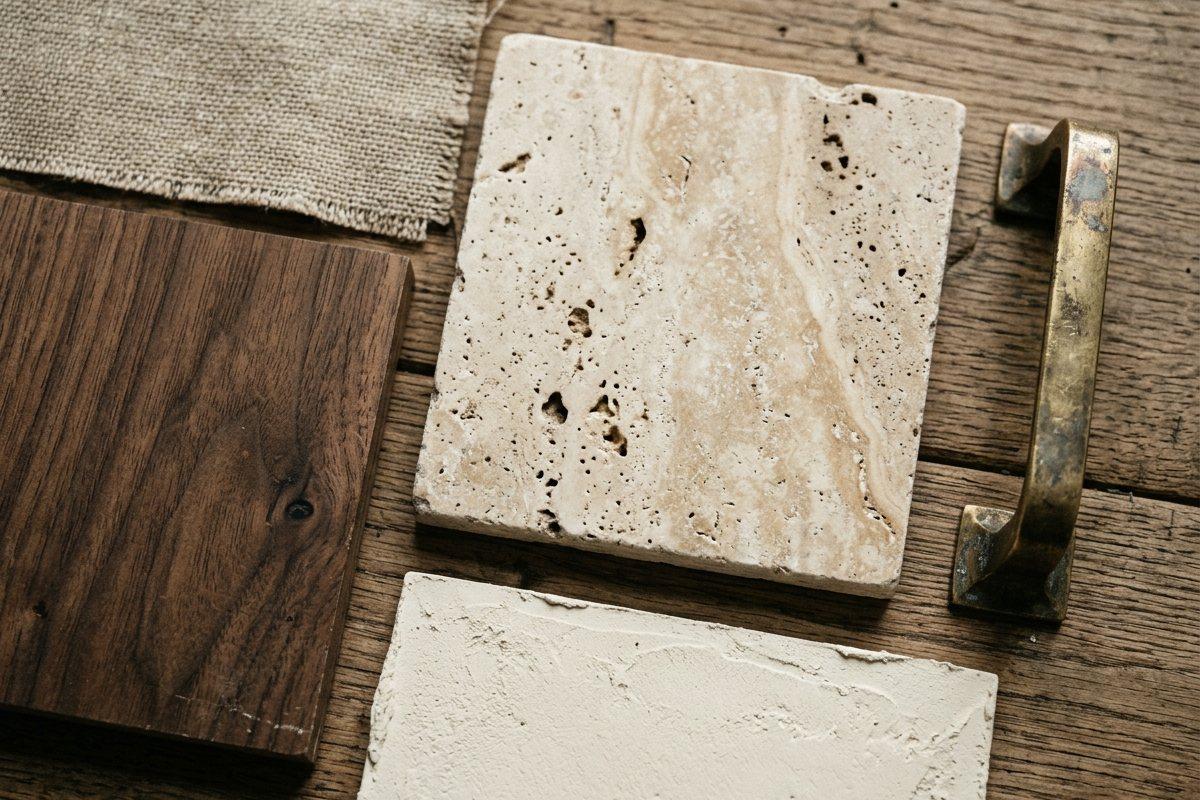
The 4 Touchpoints Worth Every Penny:
- Solid-Core Doors, Heavy Levers & Magnetic Latches: Never install hollow, featherweight zinc-alloy door handles that rattle when turned. Take standard paint-grade solid-core MDF doors, paint them the exact matte shade of your walls, and fit them with solid cast brass or knurled stainless steel levers paired with silent magnetic mortise latches (
AGB PolarisorBaldwin). The heavy, silent thud of a door closing instantly telegraphs custom construction. - Architectural Switches & Dimmer Plates: Light switches sit at eye and hand height in every single room. Replace shiny, yellowing
99-centplastic rockers with frameless matte polycarbonate, brushed bronze, or gunmetal toggle switches that deliver a crisp, mechanical click. - Plumbing Valves & Faucets: A minimalist ceramic sink basin can cost
$120, provided the faucet mounted above it features a heavy solid-brass body, a silky ceramic disc cartridge, and a durable PVD brushed nickel or stainless finish (see why cheap powder-coated matte black taps fail in our Renovation Anti-Trends 2027 report). - High-CRI Warm LED Optics (
CRI ≥ 90–95,2700K–3000K): Bargain LED bulbs withCRI < 80cast a muddy greenish-gray tint that makes expensive paint look dingy and natural oak look like plastic. SpecifyingCRI 93+light sources adds barely 15% to your bulb budget, yet renders colors with museum-grade warmth. Dial in your exact room lumen targets before buying fixtures using our Lighting Calculator.
8. Architectural Layered Lighting Instead of “Drywall Ceiling Labyrinths”
The Estimate Myth: A high-end modern remodel requires recessed 48V trimless magnetic track channels, dropped perimeter soffits, and complex multi-tier drywall ceilings.
The Engineering Reality: Carving recessed magnetic channels into drywall ceilings—and hiding remote low-voltage transformers—multiplies ceiling and electrical labor by 2.5× to 3.5×, even though homeowners spend 90% of their evenings using soft, low-level ambient lamps.
Over the past few years, residential lighting quotes have spiraled out of control. A single linear foot of recessed trimless magnetic track requires framing a dropped ceiling cavity (sacrificing 3–4 in or 75–100 mm of precious ceiling height), mudding fragile plaster-in flanges to Level 5 tolerances, wiring expensive 48V DC drivers, and buying proprietary magnetic heads.
How Pros Value-Engineer Ceilings & Light:
- Keep the Ceiling Plane Clean and Monolithic: Skim and paint the structural concrete slab (common in European and Singaporean HDB/condo apartments) or maintain a flat, uninterrupted drywall plane. Preserving ceiling height makes any room feel grander than decorative drywall coffers ever could.
- Specify Surface-Mounted
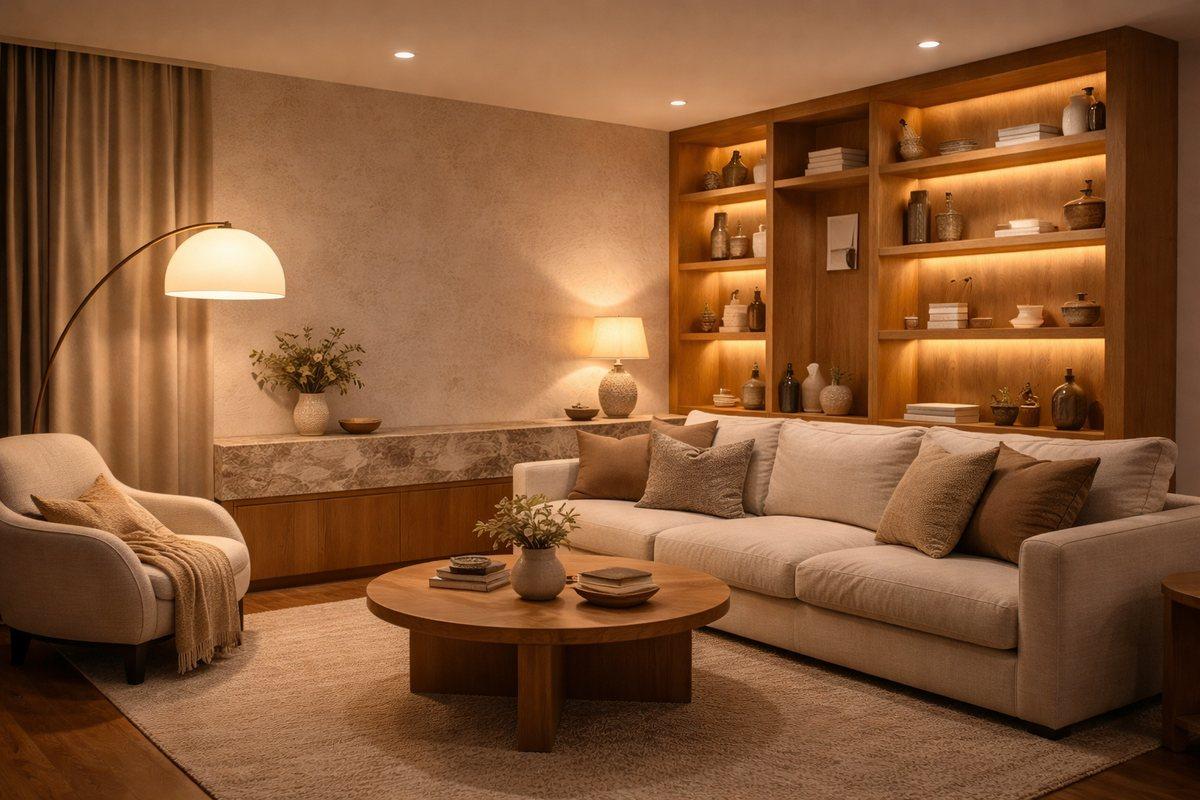
120V / 230VArchitectural Tracks Instead of Recessed48VChannels: Ultra-slim surface-mounted mains-voltage track bars install directly onto the flat ceiling in an hour, require zero drywall framing or remote transformers, and cost 70% to 80% less while delivering identical directional beam control. - Shift Budget to Eye-Level Switched Outlets: Instead of perforating the ceiling with 24 glare-heavy recessed "can" downlights, install a calm central fixture and wire wall-switched floor receptacles for upholstered floor lamps, table lamps, and plug-in wall sconces. Warm illumination at eye level (
36–60 inor90–150 cmoff the floor) is what creates effortless "Quiet Luxury" atmosphere.
9. Continuous Flooring Geometry & Offcut Engineering
The Estimate Myth: Just add a flat 5% waste factor to any tile or flooring order and let the installers figure out the layout on site.
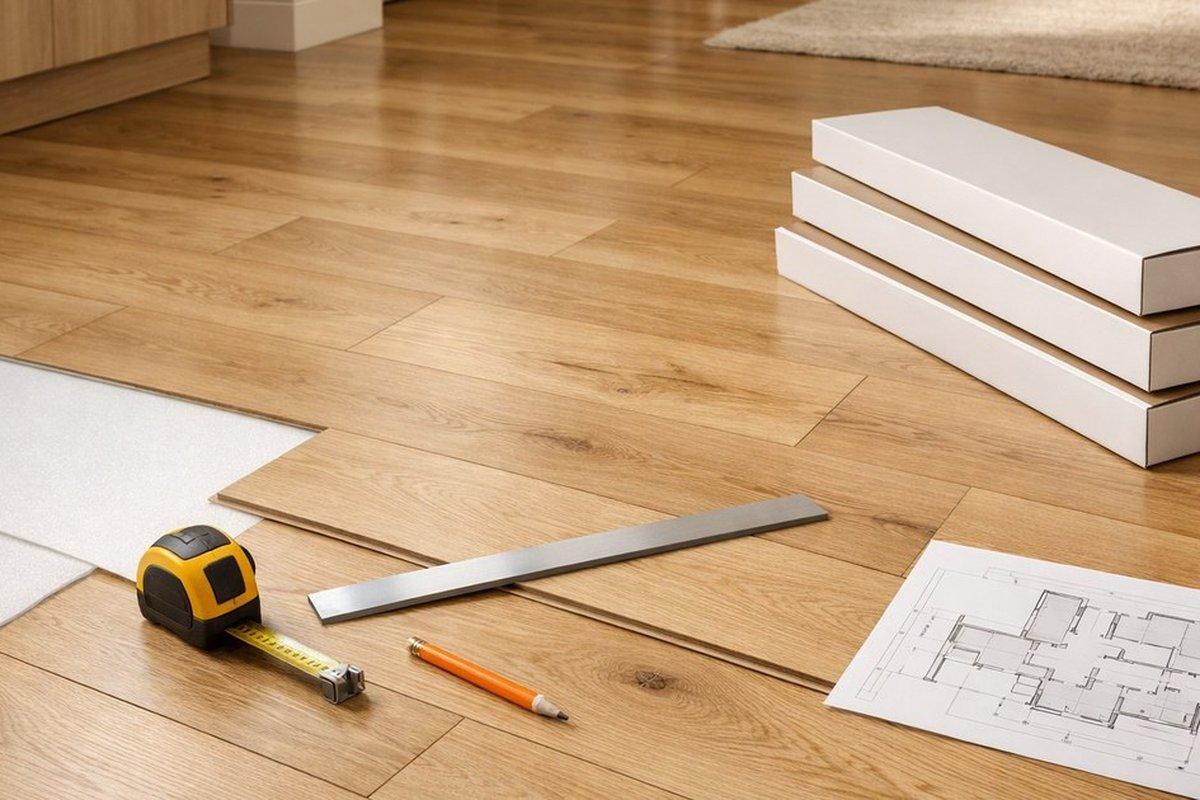
The Engineering Reality: Choosing a plank or slab size that fights your room dimensions—or specifying diagonal and herringbone patterns in tight hallways—sends 18% to 22% of your paid flooring straight into the dumpster.
Picture a hallway measuring 53 in (135 cm) wide where the specifier selects 24×24 in (60×60 cm) or 32×32 in (80×80 cm) porcelain tiles. Because of grout-line symmetry, the installer has to slice an unusable 5–10 in strip off every second slab—resulting in nearly 30% material loss.
How Pros Eliminate Waste:
- Match Module Dimensions to Room Span: In a bathroom measuring
70 in (178 cm)wide, a24×48 in (60×120 cm)slab spans the wall in three clean courses with almost zero offcut waste. - Run Continuous Random-Stagger (
1/3Offset) Straight Plank Layouts: When installing engineered hardwood, laminate, or rigid-coreSPC / LVPcontinuously across doorways without transition strips, the offcut from the end of Row 1 becomes the starter plank for Row 2. True waste drops from 15% down to 4%–6%. - Swap High-Labor Shadow Gaps for Micro-Baseboards or Wall-Matched Square Trim: Instead of routing concrete walls for recessed shadow-gap profiles, use anodized
1/4 in (6 mm)aluminum micro-baseboards or simple square-edge polymer/MDF skirting painted the exact color and sheen of the wall. It hides the mandatory5/16–3/8 in (8–10 mm)floating-floor expansion gap and costs a third of recessed reveals. Check your exact linear footage in our Baseboard Calculator.
📊 The Value-Engineering Matrix: Where to Cut vs. What You Gain
Use this master cheat sheet to audit your renovation scope before requesting contractor bids:
| Renovation Scope | The Overpriced Default (What Most Do) | The Pro Value-Engineering Hack | Direct Category Savings | Visual & Functional Result |
|---|---|---|---|---|
| Painted Walls | Full-surface Level 5 / Q4 skim coat sanded under raking light | Level 3 / Q2+ base + 140 gsm non-woven liner fleece + dead-flat paint | 30%–40% on wall prep | Bridges hairline settling cracks; velvet gallery finish |
| Bathroom Walls | 100% floor-to-ceiling porcelain tile on all 4 walls + mitered corners | Tile only wet zones (shower + 48 in / 1.2 m ledger) + DIN EN 13300 Class 1 bath paint | 30%–35% of bath total | Airy European spa aesthetic; zero "tiled tunnel" feel |
| Kitchen Millwork | Turnkey boutique showroom kitchen with 300% markup on basic boxes | Modular factory carcasses + custom oak/lacquer fronts + Blum hardware | 40%–50% off studio quote | 100% identical look, weight, and soft-close feel |
| Bedroom Storage | Full-box custom MDF/veneered wardrobes with ceiling dust gaps | Rough-framed drywall alcove (U-niche) + flush floor-to-ceiling doors | 50%–60% on closet build | True architectural built-in look flush with walls |
| Ceiling & Light | Dropped drywall ceiling + recessed 48V trimless magnetic tracks | Flat monolithic ceiling + surface 120V/230V track + switched floor lamps | 45%–60% on lighting scope | Preserves ceiling height; warm layered evening glow |
| Baseboard Trim | Chased recessed shadow-gap profiles requiring Level 5 walls | Aluminum micro-baseboard or square-edge trim painted to match walls | 50%–65% on perimeter trim | Protects lower wall edge from robot vacuums |
| Finish Sourcing | Buying through showroom with "10% designer discount" | Direct SKU bidding across wholesalers + Big-Box Pro Desk Bid Room | 15%–25% on materials | Exact same factory products without middleman fees |
Tip
Plug your room-by-room numbers into our free interactive Renovation Budget Planner right below to stress-test your estimate with a 15–20% contingency reserve, and compare typical regional benchmarks in our 2026 Home Renovation Cost Breakdown.
Budget Planner
Structure renovation costs by category, add contingency, and get a client-ready total in seconds.
20-25% keeps your remodeling budget safe
⛔ The Red Zone: 5 Structural & MEP Systems Where Cutting Corners Will Bankrupt You
Value engineering is never about buying the cheapest parts for systems buried behind drywall or under concrete. Saving $300 on rough plumbing or electrical components can easily trigger a $15,000 tear-out two years later. Never compromise on these five non-negotiable foundations:
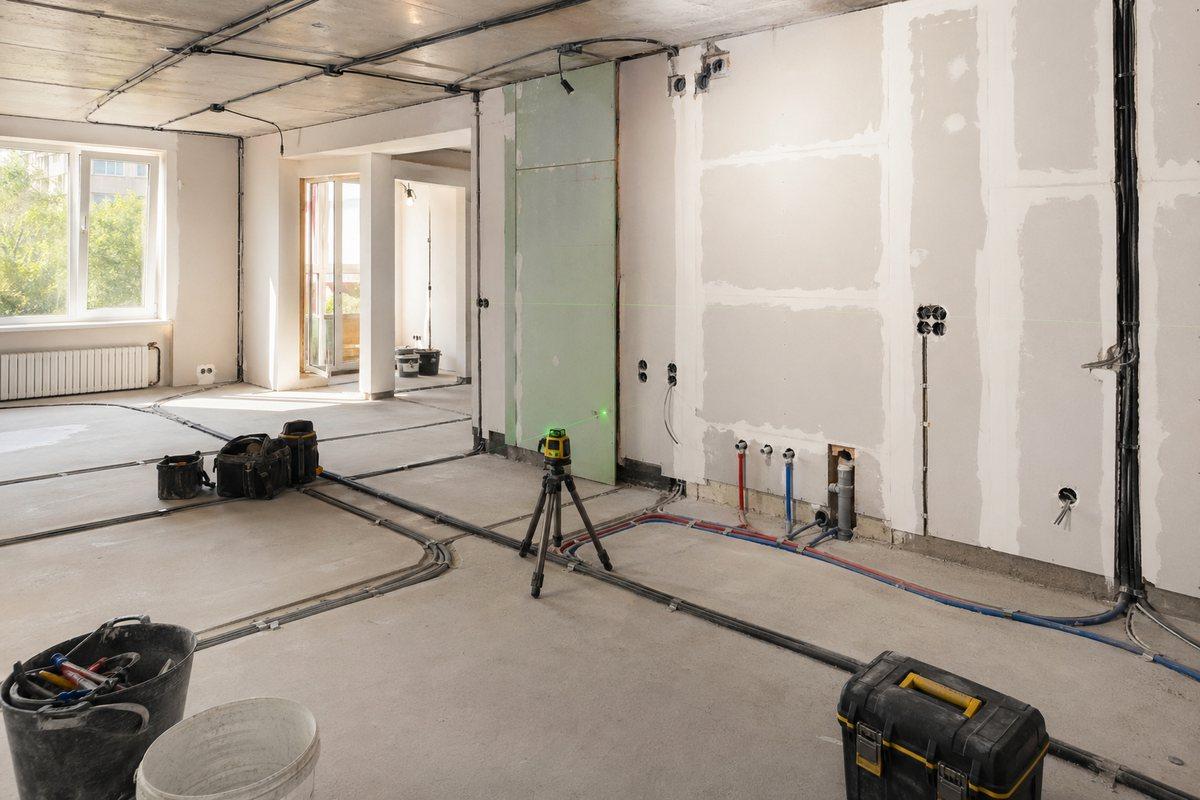
- Main Water Shutoffs, Pressure Regulators & Leak-Detection Valves: Specify forged Dezincification-Resistant (
DZR) brass ball valves, diaphragm pressure-reducing valves, manifold blocks (Viega,Uponor,Far), and an automatic smart shutoff valve with floor pucks. A snapped cast-zinc valve floods your home and the neighbors below in minutes. - Code-Compliant Copper Wiring & Arc/Ground-Fault Breakers: Never allow undersized non-standard wire gauges or counterfeit circuit breakers. Insist on full-gauge copper conductors (
NEC AWG 12/14in the US;1.5–2.5 mm²low-smoke halogen-free cable in Europe/Asia) protected by dedicatedAFCI / GFCIorType A RCDresidual-current devices. - Two-Coat Liquid/Sheet Waterproofing Membranes in Wet Zones: Tile and grout are water-resistant, not waterproof. Every shower pan and wet wall must be sealed with a continuous elastomeric membrane (
ANSI A118.10/Schluter Kerdi/Mapei Mapelastic) with reinforcing fabric tape embedded into every internal corner and pipe collar. - Subfloor Flatness Under Floating Click Floors (
SPC / LVP / Engineered Wood): Both the North American TCNA / NWFA and European EPLF standards mandate a subfloor flatness tolerance of1/8 in over 6–10 ft (2 mm over 2 m). Skipping self-leveling underlayment under rigid-coreSPCvinyl causes hollow deflection underfoot, snapping the thin click-lock joints within six months. - Targeted Acoustic Decoupling on Bedroom Party Walls: You don't need to soundproof every wall in the house, but the shared party wall behind your bed headboard—and any vertical cast-iron or PVC soil stacks—must be treated during rough framing using high-density mineral wool, resilient isolation clips, and damped double drywall. Calculate the exact acoustic assembly in our Soundproofing Calculator.
For a complete pre-drywall inspection sequence, read our engineering guide Renovation Without Rework in 2026: 12 Decisions That Save Budgets along with our foundational 7 Core Renovation Budgeting Habits.
Frequently Asked Questions
What is the difference between Level 3 / Q2+ drywall with painter's fleece and a Level 5 / Q4 skim coat?
A Level 5 (US) or Q4 (European) finish requires skimming 100% of the drywall surface with polymer compound and sanding under grazing light, which increases painting labor costs by 35% to 45% without preventing hairline settling cracks. Stopping mud prep at Level 3 / Q2+ and hanging smooth 130–150 gsm non-woven painter's liner fleece reinforces the wall against micro-cracks and delivers an indistinguishable dead-flat painted finish at a fraction of the cost.
Is it safe to paint bathroom walls instead of tiling floor-to-ceiling?
Yes, provided you zone the bathroom by direct water exposure. Install porcelain tile over waterproof membrane inside the shower enclosure and up to 48 in (120 cm) behind the vanity and toilet. Finish the remaining dry walls with cementitious skim coat and a mildewcide-protected architectural paint rated to DIN EN 13300 Wet Scrub Class 1 (or high-performance ASTM D2486 bath enamel). This cuts bathroom tile and labor costs by up to 35% with zero mold risk.
How does the Home Depot or Lowe's Pro Desk Bid Room trick work?
When your consolidated material order (tile, drywall, subfloor mix, doors, plumbing rough-ins, or lighting) exceeds $2,500 to $5,000, bring your itemized SKU list to the store's Pro Desk instead of paying retail at the checkout lane. Ask the commercial specialist to submit the order through their Bid Room volume-pricing system, which typically unlocks an automatic 8% to 22% discount depending on product margins.
How can I get a custom-looking kitchen for half the showroom price?
Use a hybrid assembly strategy: purchase standard-width modular melamine carcasses from a mass-production manufacturer (since cabinet interiors are hidden once doors close), outfit them with top-tier soft-close hinges and drawer runners (Blum or Hettich), and order bespoke 3/4 in (19 mm) natural wood veneer or matte-lacquered fronts from a dedicated CNC millwork shop. Pair with a continuous quartz or sintered stone slab to save 40% to 50% compared to boutique studio quotes.
What are the most important things never to cheap out on during a remodel?
Never cut corners on components buried behind walls or under floors: main water shutoff valves, pressure regulators, manifold plumbing, full-gauge copper electrical wiring, AFCI/GFCI/RCD breaker panels, two-coat shower waterproofing membranes with corner banding, and subfloor self-leveling compound under floating SPC/LVP or wood floors (1/8 in over 6 ft / 2 mm over 2 m flatness tolerance).
How do I stop a contractor from hitting me with expensive Change Orders mid-renovation?
Before signing a contract, never pick the lowest bid blindly. Hand each contractor your scope of work and ask: "What mandatory code or surface-prep steps are missing from this estimate that will trigger a Change Order once demolition starts?" Write all disclosed prep items—such as subfloor grinding, primers, waterproofing tape, floor protection, and debris haul-away—directly into a fixed-price turnkey contract addendum.
Turn the idea into a working budget
Start with the main calculator, then move into the related tools and the matching topic hub.
Budget Planner
Build a renovation budget by category, currency, and contingency reserve.
Planning and Budget Hub
Keep budgeting, phasing, savings, and renovation cost control in one focused planning cluster.
Open hubTile Calculator
Estimate wall or floor tile, waste allowance, and adhesive consumption.
Calculate tilePaint Calculator
Estimate paint coverage by room size, openings, and number of coats.
Estimate paintThis piece is structured as a practical sequence of work, material choices, and decisions without extra steps.